Sunday, March 20, 2011

Triple Sec


The world of orange-flavored liqueurs is a big one. Let's get a few things straight at the start. Triple Sec is orange liqueur usually made from dried bitter and sweet orange peels and grain alcohol. There are many different brands of triple sec, like Cointreau and Grand Marnier. Cointreau is apparently brandy-based, though a trip to their purple-prosed site reveals nothing but very funny copy.  Grand Marnier is a cognac-based orange liqueur. I'm sure I've had my fair share of "well" orange liqueurs, like De Kuypers and Marie Brizard, but I think I've stayed clear of CuraƧao, that crazy blue stuff.

A while back I was sent some sour oranges from my mother in Florida and being fairly marmaladed out, I decided to make some booze. I had brandy in the house so I decided to go with it. I guess this is a Cointreau-style triple sec? There were a few recipes I sifted through, but what I was most intrigued by was a technique to bake orange slices at a low temperature first and then to soak the slices.

Preheat oven to 200 degrees

4 large sour oranges, sliced 1/8"

Arrange the slices on a cookie tray lined with parchment paper in a single layer. Bake them for two hours and then leave them in the warm oven. Doing this step at night works well--leave them overnight in the oven. Place citrus slices in a quart jar, cover with brandy and let sit for four weeks. Then strain the fruit, leaving the brandy in the jar. Add one cup of sugar and let sit for two more weeks, inverting jar daily until sugar is dissolved.

Note: I froze my brandy soaked citrus, thinking it might be a lovely addition to a marmalade whenever I get the impetus to make marmalade again.

I didn't add a simple syrup to the brandy because I wanted to really taste the oranges. As I'm writing this, I'm sipping a small glass. It's not as sweet as triple sec (though I must admit, I haven't had a straight slug of triple sec since I was what, 13?), and the taste of oranges first, followed by a bitter tang afterwards is very pleasurable. I now know why this was at one time a digestif, or aperitif.

Check out these other recipes:
Mrs. Wheelbarrow's version with Cara Cara oranges and vodka
An interesting version from Thursday Happy Hour that "tastes like orange hard candy"
and one from Food, Literature, Philosophy
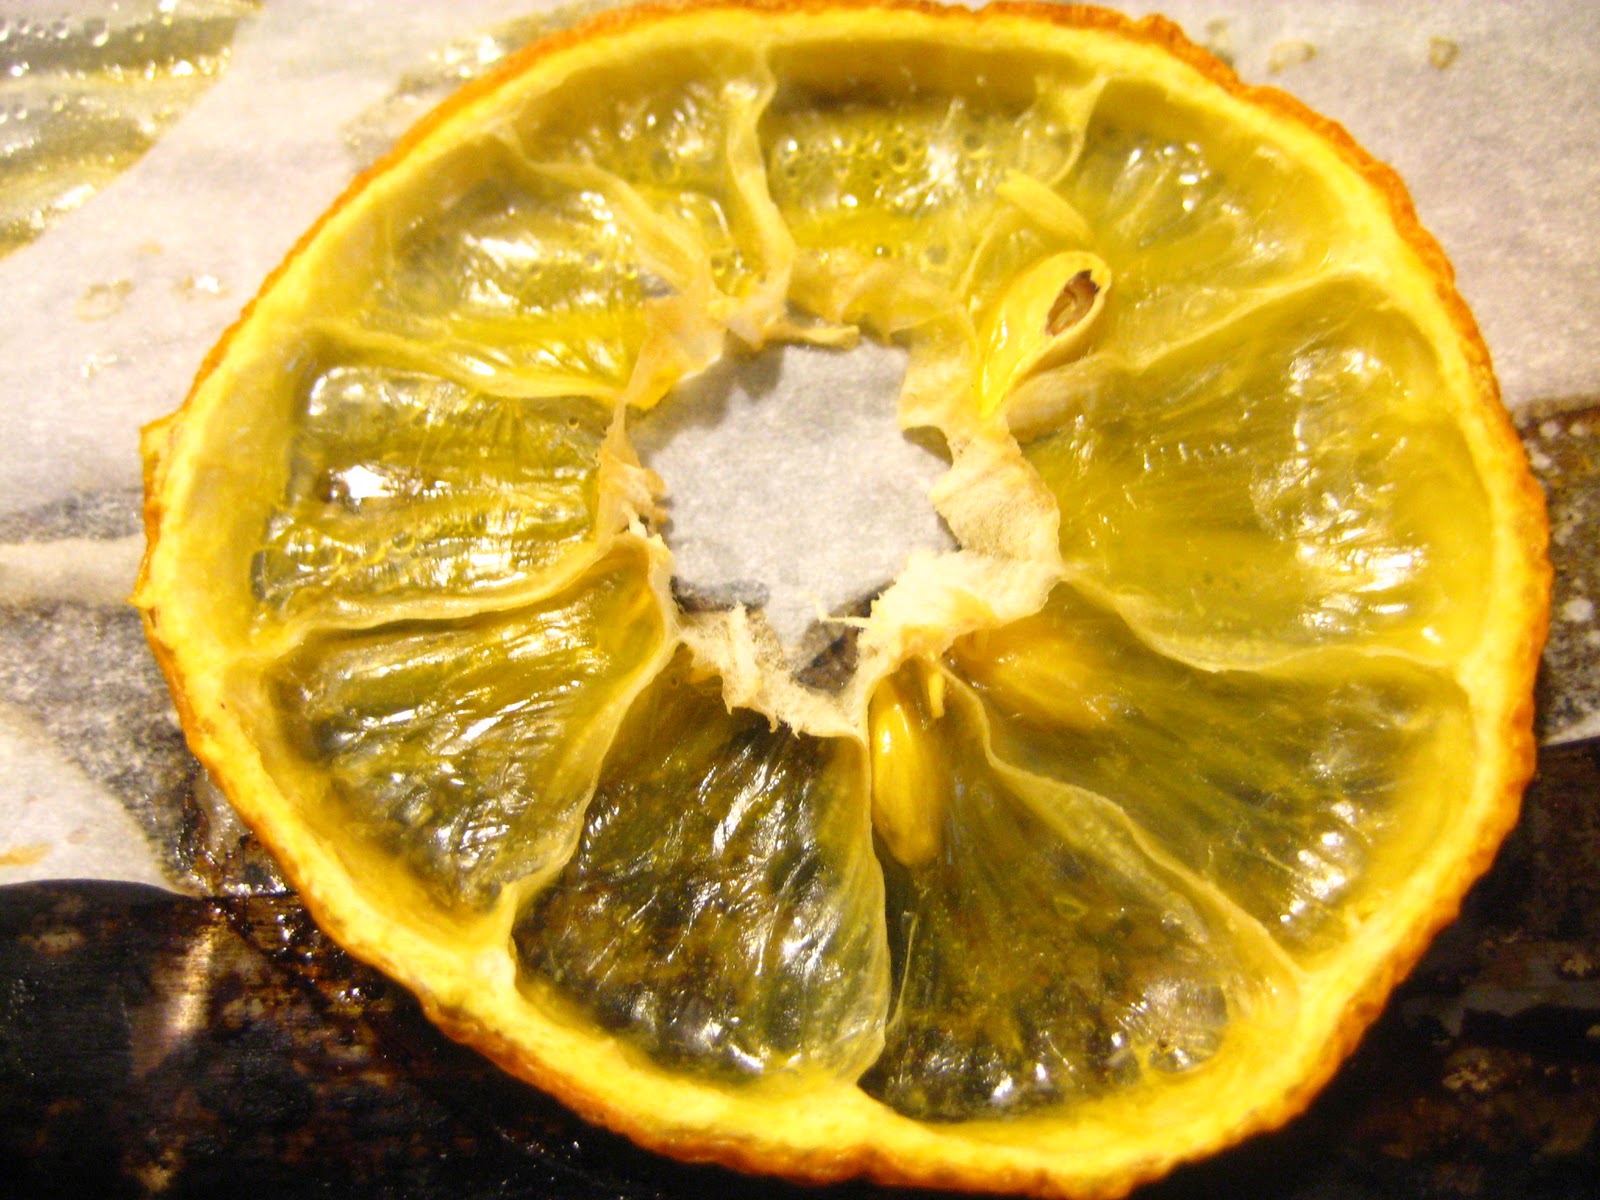
Roasted. About to be soaked in brandy.

Tuesday, March 15, 2011

Corned Beef Brisket


Can it possibly be the third month of Charcutepalooza?? Are you following along with Mrs. Wheelbarrow and The Yummy Mummy? And Punk Domestics and Food52? It seems like everywhere I go on the internet, I've got delicious, meat-curing company. This month's challenge--brining meats--can be found here in detail. Because I already had a grass-fed, local, five pound brisket in the freezer, I was prepared. There were plans for this thing to be corned beef as soon as I got it.

It wasn't me who had the plans, by the way. My husband, who is half Irish, had made the bid. Me? If I see an St. Patrick's Day parade I run the other way. Needless to say, I don't have any memories of brisket, in any way. I'm sure my mother made it once or twice. And I've made it once or twice to appease my husband. A huge sandwich from Katz's deli in NYC or some smoked meat from Montreal's Schwartz's once every couple of years and I'd be fine. The times I've made it before I didn't realize I was making corned beef, because honestly, it didn't taste like corned beef. It tasted good, like a nice chunk of beef, a little bland, surrounded by watery cabbage. Not too exciting.

Up until now in this challenge, I've been pink salt-less. This month I decided I wanted that pinky pink salt corned beef. But then I did a weird thing. I was rushed for some reason (I'm an impatient sort) and felt like I didn't have time for ordering pink salt on line. So, I went to Agway, a local feed/garden store, forever lured by their surprisingly well-stocked preserving section, and purchased some Morton's Tender Quick, a curing salt blend. I based my Tender Quick calculations on a post on a Garden Web forum. (Btw, Garden Web forums are filled with gems. There are some obsessive people posting willy nilly on those things!) The Kitchn also had a post on corned beef with Tender Quick, but I felt that two cups of Tender Quick was too much.

What happened? I heated up my cure and spices in water in a big pot. Once it was dissolved I put it on the porch to cool, and it really smelled amazing, of peppercorns and juniper goodness. Later on that evening, after trimming the meat well, I put it into a ziploc with the brine, and it sat in the fridge for about a week. It didn't turn very pink, which I was happy with. As I cooked it off (in the largest braising pan I have) the house smelled incredible. It was done in three hours.

Once cooked, it was brightly pink, and delicious, though I will say that it was a tad dry for my liking. Steve, however, was elated. And we ate it for days. This huge slab of meat kept giving. The next day I made massive grilled corned beef sandwiches, reuben-esque, you might say. Wheat bread, muenster cheese, thick slices of corned beef, and some crazy good garlic and dill relish. Then on Sunday morning we had a huge plate of the best ever corned beef hash. Now, that was worthwhile. How can people eat that dog food they sell in cans??

The thing I hate the most about corned beef dinners is the cabbage. Something about cabbage that's been boiled for hours makes me a bit ill. I did a quick boiled salad instead, lightly pickled. Here it is:

Two parsnips, peeled and thinly sliced in rounds
One small head of cabbage, cut into bite-sized wedges
A few carrots, peeled and sliced
Scallions, chopped

In boiling water, cook the root vegetables one at a time for two to three minutes, pulling them out with a slotted spoon for the next batch. Put them in a bowl as you go, and toss the scallions in at the end to wilt. Dissolve a tablespoon of sugar in a quarter of a cup of apple cider vinegar and pour over the warm veg. Let them sit and pickle a little.

Corny beef.

Sunday, March 6, 2011

What To Do When Your Jams Fail


I've been really, really lucky lately. Not only did I get some calamondins sent to me from Florida, but I also got some star fruit. My mother is pretty dang cool. And so is the friend who owns the trees she picked these fruit from! After opening this huge box of star fruit (or carambola), I got right to work preserving them. I froze some, slicing them and freezing them on trays. Star fruit are good for fresh eating, and I'm not completely sold on canning them. I should point out that star fruit are high in oxalic acid, and those with kidney issues might want to abstain. I didn't know that about star fruit!

STOP. That's how this post started last week. To be honest, I wasn't too thrilled with my preserves, so what did I do? Made another batch of star fruit jam. I don't learn. I had heard people raving about star fruit jam. Why just the other day while my son ate a star fruit for snack time in toddler play group, a father gushed about the star fruit jam he had once and how good it was. I must have just made a mistake on the first batch, I thought.

Well, star fruit jam is not as easy as it seems. And if you want my opinion, it doesn't make a good jam on its own. I'm not the only one who says that. The woman whose tree I got mine from concurs. I learned this after I made the two jams. I did find, however, that they are good mixed with something else. I made a key lime-star fruit-calamondin marmalade, and it came out quite nicely. I think star fruit need to be with other fruit. Like pineapple. Wendy Read of Sunchowder's Emporia gave me a starfruit recipe that paired the carambola with pineapple. Did I use it? No. Though I bet pineapple would be perfect! Anything with high acidity and punch would be nice. How about Flamingo Musings' Carambola Pepper Jam? (Which I didn't make.) Something spicy might be just the kick that star fruit need. Sigh.

So. I made two jams. One is preserved star fruit with orange peel pectin. The other is a light jam that I used Pomona's Pectin in, and lowered the sugar thinking it would let the subtle taste of the star fruit shine. Nope. And neither jam set. The reason why I posting this is not to complain (well, maybe a little), but to point out that once you have made a jam that you are not happy with, there are a few things you can do to avoid chucking the lot. I do admit though, there are times when tossing it seems the only route. One time I saw a chef's batch of nectarine jam that had turned to candy. Hard as a rock. That might need to be tossed.

1. Let it sit and try it in a month or two. I just tasted a peach ginger preserve that I thought was boring, and upon tasting it I found I was dead wrong. It's delicious. Was I bored of peaches at the time? Did it need to sit? Who knows. But I'm glad I didn't give it all away.

2. Cook with it. I'm always adding a half-pint of jam to one baked good or another. Obvious choices are muffins and quick breads and smoothies. Make sure to reduce the sugar in the recipe. Or the obvious savory applications, like roasted or grilled meats, salad dressings and the like. Sometimes dull or bland preserves are the perfect thing for cooking applications.

3. Re-cook it. Yes, open those jars and add it to some more fruit and make a new jam. Obviously, this is for someone who's comfortable creating their own jams. But keep this in mind: you can can foods that have already been canned. Capisce? I opened four jars and made a Meyer lemon star fruit jam. I think it tastes great, but still the set isn't perfect. That is no problem at all because now it actually tastes good. I might use the rest for a chutney. And I don't have to turn these around right away. I can wait a little bit. Star fruit rhubarb jam perhaps?

4. Give it away to someone who might like it. I wouldn't do this with these star fruit jams, because they just weren't right. It tasted like I made cucumber jam. Bleh. But sometimes it's just a personal issue. And if you give it away, then it's their problem! Ha, just kidding. I recently received a lovely jar of banana jam, and I couldn't get past the smell. I have a thing with cooked bananas. I think it's psychological. But put in a batch of buttermilk muffins, and then I'm eating way too many.

What do you do when your jams fail? Besides curse, of course.

Monday, February 28, 2011

Oven Canning


NOTE: Oven canning is a controversial subject that I wanted to discuss, not necessarily to recommend. I want to state again that the NCHFP is against oven canning, and they make the guidelines for safe food preservation. If you are a new canner, please stick with a boiling water bath to process your food. Please read through all the comments, they are informative and helpful. I want to stress that when discussing this procedure, it is with regard to high-acid jams, marmalades and jellies only.

Recently I made some star fruit jam (recipe to follow in a few days!). It was a rather large batch, so I felt it was time to try something new: a method of sealing your jars that is called oven canning. There's a lot of dissent on the subject, and I'm writing down what I've come across, both yay and nay, in order to make some sense of the subject. I'd love to hear from you in the comments section if you have any thoughts!

I first became aware of this technique via artisan jam company, Blue Chair Fruit. BCF proprietor, jammer and author, Rachel Saunders, uses the oven for sealing her jars and recommends this process in her book. Many other small jamming companies use this procedure. Why? I think the biggest reason is because you can process a lot of jars at once. What's surprising is it's frowned upon by the National Center for Home Preserving, and many other canning heavy hitters. So then why are companies allowed to do it? [Side note: Honestly, you could let your jars seal on their own (which is called open kettle sealing) and no one would be the wiser. It's sealed, right? Who cares how you sealed it? And, as you won't get any really bad stuff from fruit (as long as said fruit are not low acid) you really would never know. Oops! I'm digressing.]

I've been asking around about this, ever since a friend of mine took a class with BCF and raved about the technique. She loved that she didn't need to bring her big pot out, and fill it with water, etc. etc. Point taken. Rebecca at RCakewalk also found it to be a great technique; check out her post on it. I pestered Doris from Doris and Jilly Cook about it and she said, sure, why not? As long as you don't get silly and use this technique with anything but fruit. Why? Because fruit is higher in acid, and generally less risky. (Please see Doris' comment below, with clarification on what she had said to me about oven canning.)

Here's how it goes:

Oven canning: Heat your oven to 250 degrees. If you are not sure of your oven's temperatures, and don't have a oven thermometer, I suggest that you stick with water bath canning. (And then, go out and buy a oven thermometer, for goodness sakes! They're, like, four bucks.) On a cookie tray arrange your jars facing up. You will want to heat these for a good thirty minutes. BCF recommends putting the lids in at the same time, but I thought that might compromise the rubber seal so I put them in, rubber side up, at the last ten minutes.

Be careful! If you leave the jars in over a half hour (which is fine) please watch out when you start ladling your fruit in. Always, always pour a little bit in first. If the jars are too hot, it will bubble immediately (and possibly splatter you). If this happens, let the jars cool a few minutes before you begin. Fill the jars as directed in your recipe (usually 1/4 to 1/2 inch). Seal the jars, and return them to the oven for about fifteen minutes. When they are done, put the cookie tray with the jars on it cool on a rack. They will ping as usual, and seal themselves.

It took me a while to try this out as I'm a creature of habit, and I've come to find that this technique seemingly works just fine. The best thing about it, is that when doing larger batches (which I rarely do) it's easier. It's also a lot quieter. Call me crazy but a pot of water boiling furiously for almost an hour sort of keeps me on edge. Using the oven, it was just me and the pot of jam. I usually do very small batches, only around four or five half-pints at a time.

However, I am new to this process and am still feeling it out. I would love hear what you have to say about it. Have you tried it? Do you love it? Do you utilize it in your business? When Saunders was on Martha Stewart's show, she made a jam and also showed her oven technique. Martha seemed to dig it. There's a lot of appreciation for it, but there's also a great deal of vehement opposition.

Here are a few quotes from some venerable institutions, all in the anti-oven-canning-camp:

From the National Center for Home Food Preservation:

"Is it safe to process food in the oven?
No. This can be dangerous because the temperature will vary according to the accuracty of oven regulators and circulation of heat. Dry heat is very slow in penetrating into jars of food. Also, jars explode easily in the oven."

From the Agricultural Extension Service at the University of Tennessee:

"...food inside a canning jar in the oven can be heated no higher than the boiling point of water (212 degress F at sea level) regardless of how high the air temperature is inside the oven. This is a basic law of physics."


From Pick Your Own:

"Oven canning is extremely hazardous."

Sunday, February 20, 2011

Candied Calamondins


I recently got an amazing package in the mail from my mother. It was filled with calamondins: leetle, teeny, tiny oranges with a super sour bite. They can be found, on a bush or small tree, in the tropical south zones. Originally from Southeast Asia, they have been planted here as an ornamental, but you know me, I'm wanna eat it! I received about five pounds (me to my mom after she sent me a small handful to inspect: "No, that's not enough, I need more"). So far I've started calamondins in gin, and salt-preserved calamondins. As it so often goes during this time of year, I'm a little marmaladed out. I was wracking my mind for something new. After paging through a million books, I settled on this recipe for Kumquat Preserves from this kooky book:


You probably have a stack of vintage cookbooks like these, right? I particularly like the ones that have canning sections even though you are not to follow them for canning, as they are outdated and possibly unsafe, as per USDA and the National Center for Home Food Preservation. However, my personal guidelines for these recipes are that usually fruit is a safe bet. I do my research, I compare recipes, I check the sugar, etc. I decided to can these at ten minutes. They are so high in acid, and the only other ingredients are sugar and honey, that I felt it was safe to can. But that's me. I'm crazy like that.


It is said that calamondins can be used in recipes like kumquats, but I don't know about that. Calamondins have very thin skin and are very juicy and filled with sort of big pits. More like a really small tangerine. I love these old recipes. They take a little while to decipher. Just a small paragraph and you're on your own. Which I like. I will note that I almost didn't add the 2 cups of honey the original asked for. 2 cups of sugar and 2 cups of honey seemed like a lot to me. Then I realized that the honey is the glucose that keeps the sugar from crystallizing, so I quickly threw in a 1/4 cup of honey. It seems to have worked, but maybe I'm making that up. 

I am really looking forward to these as a garnish for a drink, come the warmer weather. They are certainly candied yet very tart. Maybe with that calamondin gin I'm making. And don't forget about the nice syrup you get as a extra bonus! The most brilliant idea I came across for calamondins is to freeze them and use them as ice cubes. Maybe I can get my mom to send me some more...

Candied Calamondins
adapted from My Better Homes and Gardens Cookbook, 1940

Note: this is a three day or so procedure.

1 quart of calamondins
1 quart of water
2 cups of sugar
1/4 cup of honey

Calamondins, when plucked from the plant, will rip the stem right out of the skin. When you pick them you might want to use clippers or shears so that they stay intact until you need to use them. Otherwise, they shrivel up, and who wants that? When you are ready to use them, pull the stems gently out. You will have a small hole where each stem was. Perfect. If you were preparing kumquats, you would prick the skins. This is so they can absorb the sugar.

Soak the fruit overnight in salt water. 1 quart of water, 1 quart of fruit, 1 teaspoon of salt. Why? I don't know. Maybe you can tell me. I was skeptical, but strangely I did it.

Drain them. Cover with fresh water in a preserving pot and bring to a boil. Cook until tender. Which was a few minutes. These are very thin-skinned fruit. Drain.

Have this heating up in another good preserving pot: 2 cups of sugar, 4 cups of water, 1/4 cup of honey. Once this is simmering, add the drained, tenderly boiled fruit in. Simmer until the fruits look translucent, and the syrup is thick. (When did we stop spelling syrup sirup?) Pour this mixture into a glass bowl and cover with wax paper.

Let stand for two days. 

Bring back to a simmer for ten minutes and cook until it looks right. For me that meant thick syrup, candied fruits. I ladled the calamondins into hot 4 ounce jars and processed in a boiling water bath for ten minutes. If you prefer, pour the whole lot into a quart jar, seal it. When it's cool put it in the fridge. They will probably last until you have a nice cocktail party. And then they will be gone!

For more a-quat-ic inspiration go check out Michael's candied mandarinquats and Tigress' fermented sweet preserved kumquats!